
Welcome to my world of Sn3 Scale Model Railroading

Building The
Ridgway Sand House
By
Tom Troughton, MMR
| Here are some photos of a display that was constructed for Bill Banta to use as part of his, "Banta Modelworks," sales display. Many of you know I don't care to use solvent based materials, but I made an exception and gave the bass wood walls of the sand drying house a light coating of sanding sealer. Afterwards, they were painted and weathered with liquid acrylic craft paints. | |
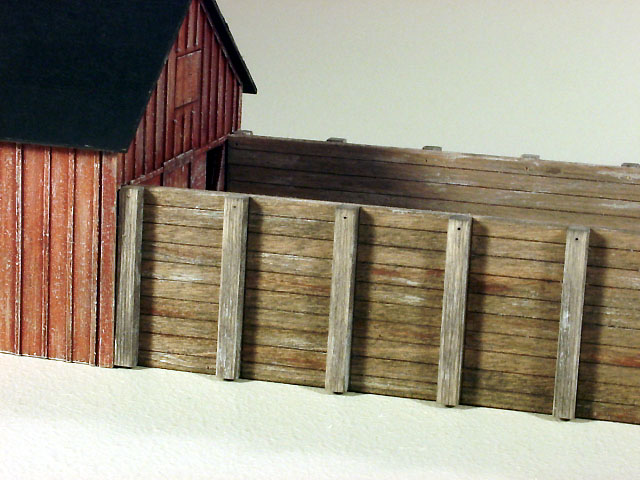
 Photo 1. Here's an overall view of the display elements. They will eventually be mounted on a piece of 1/2" Gator board, along with a short piece of track and ground cover. Additional weathering on the roofing and chimney still needs to be completed at this point. |  Photo 2. The three laser cut bass wood pieces of the sand crib side walls were distressed with an old hack saw blade, then brushed with a mixture of alcohol and black shoe dye. The solution was quickly blotted up with an old cloth to prevent warping. Horizontal dry brushing of acrylic paints were applied before the colored and weathered vertical timbers were glued into positioned. |
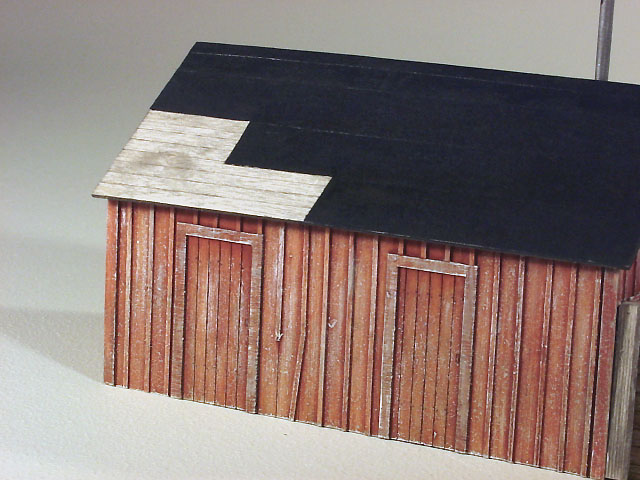
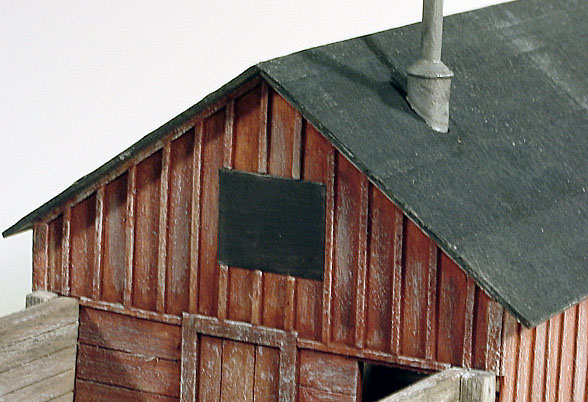
 Photo 3. After the roof pieces were glued into position, the exposed roofing slabs were painted with the shoe dye and alcohol mixture. Before spraying the roof with a adhesive, the site where the roofing boards would be exposed was masked off as well as the sides of the building. Strips of tissue paper, cut to a scale 3' width, were then applied using the laser scribed lines as guides. Polly Scale Weathered Black paint was hand brushed on for coloring and as an additional sealant for the edges of the tissue paper. |  Photo 4. This view provides a good look at the drying house end that butts up against the sand crib. The upper window opening was plugged with a piece of bass wood scrap to provide a good surface for the tin covering. |
 Photo 5. The holes were drilled completely through the supporting timbers with a #74 drill to accept brass wire, which represent the connecting rods. The holes will be plugged with NBW castings, completing the details. |  Photo 6. A thin piece of brass was used to represent the tin panel on the end wall. It was attached with a small piece of double faced tape. Before it was attached, I colored the brass with gun bluing solution. |
 Photo 7. A piece of untempered Masonite was cut slightly smaller than the outline of both components. It was glued to the bottom of both units to reinforce the bond between them and also to raise the bottom of their walls to be even with the top of the ties. |  Photo 8. While the glue was setting up on the bottom piece, a section of Tomalco track was cut and attached to a 6"x12" slab of 1/2" thick Gator Board with Liquid Nails for Projects. The outer edges of the board were painted with black paint then sealed with a coat of satin finish Polyurethane. |
 Photo 9. The structure was glued into position with yellow glue and weighted down with what ever was handy and within reach on the workbench. The pile of sand for the crib was created by shaping a piece of foam to the coutour needed, then inserted up into the bottom of the crib before it was glued to the Masonite base. The surface of the foam was carefully dampened with the white glue mixture and silica sand was carefully sprinkled in place. |  Photo 10. Scenic materials were added next. Real cinders from Chama and some roadside dirt from the Victor, Colorado area cover most of the Gator Board. Woodland Scenics ground foams were sprinkled on top of the mix. Everything was given a careful misting of soapy water before a 50:50 solution of white glue and water was applied with a large eye dropper. The interior of the sand bin contains a pile of sand along with a small tree and several shrubs. |
 Photo 11. A small twig was used as an armature for the tree and some Woodland Scenic tree netting was draped around it. Holes were drilled in the floor piece and tufts of jute were glued into them. |  Photo 12. Here's the completed kit mounted on its base and fully sceniced. |
| The following photos were taken in our backyard featuring the natural woodland background. | |
 |  |
 |  |
 | |
| That's it for the brief tour of the Ridgway Sand House kit construction and display. I hope you enjoyed it. | |